Showing posts with label main dish. Show all posts

2.11.2012

Project: Maple Mustard Glazed Chicken

I've been in a health kick lately, but I really haven't been successful. LOL. Looking at various recipes that feature low calories but tons of flavor, I was given the option to slave over the stove, or eat out. Basically, I didn't find my options that attractive, until I found this recipe. This recipe brags 200 calories each serving, plus it packs a lot of flavor.. I mean, what can go wrong with Maple and Mustard flavors??                                                              So, off I went to grab the ingredients. It wasn't hard, the ingredients can easily be found in your local grocery if not in your pantry. The procedure was easy enough, brown chicken, put other ingredients together, bake. Easy, right?           
I substituted the maple syrup with Amber Agave, cutting the measurement in half. But other than that, I followed the recipe.

The Verdict:
It was really good. Plus, the flavors complimented each other. I put it over my salad and it was really moist, and had tons of flavor. The chicken can be served over rice too. Another recipe to put in my favorite list!

Project: Chicken with Dijon Glaze

I've been looking at chicken recipes, and for low calorie ones. I saw this recipe from Julia's Healthy Italian Blog. and saw that this is easy and quick. Plus, I can just prepare it beforehand, put in the freezer, and thaw and cook it whenever I want it.

For the recipe, click here.

I followed the recipe, but I used chicken breasts. It might look good when it's marinating, but it turns into a beauty when it's cooked. Smells good too!

The Verdict:
The chicken smelled so good! Plus, the vinegar-y taste was just perfect. It was moist, flavorful, and pure deliciousness. It tastes amazing, plus the fact that it was so easy to make makes this a favorite!

1.29.2012

Project: Creamy Lemon Chicken with Asparagus

This weekend, I was looking for something to eat. I came across 2 chicken breasts leftover from the Chicken Pillows. Then, I remembered that I got Philadelphia Lemon and Herbs Cooking Cream Cheese when I bought the groceries. 

Recipe Number 1:

So I thought of making Creamy Lemon Chicken. Here are the ingredients that you will need:

2 Chicken Breasts, cut into strips
1/2 Cup Flour
Seasoning (Salt, Pepper, and Garlic Salt)
Oil for sautèing 
1/2 Cup Philadelphia Lemon and Herbs Cream Cheese
*Capers (optional)\
*milk/water (optional for cream cheese)

Procedure:
1. Season the strips of chicken with the seasoning.
2. Dust the strips with flour
3. In a pan with some oil, on medium heat, sautè the chicken strips until brown.
4. Put the Philadelphia Lemon and Herbs Cream Cheese in the pan and cook in low heat.
5. The cream will thicken, if you want a more watery mixture, you can put milk or water.
6. ** Put the capers in.**
7. Let it cool and serve with mashed potatoes/rice/pasta.

The Verdict:
This recipe was a bit too creamy for me. So it would be good to serve it over something. The chicken was yummy, but the creaminess of the cream cheese was a bit overpowering since I did not eat with pasta or rice. It was good with mashed potatoes, but this dish would be better off on top of pasta or rice.

Recipe Number 2: 

I am a big fan of asparagus. I never used to eat vegetables but this made me see how much I was missing. I LOVE THIS RECIPE. My friend made this and I adapted her recipe but made some changes to it. My version might not be that healthy, but it sure tastes good!

YUMMY ASPARAGUS:
1 Bundle of Fresh Asparagus
1/4 Cup of I Can't Believe It's Not Butter Spray
Salt
Pepper
Garlic Salt
Mrs. Dash Original Seasoning
Mrs. Dash Table Blend Seasoning
Half of a small lemon

Procedure:
1. Cook the asparagus. (I usually steam them. If they have thick stems, I steam them for 5 minutes. If they have thin stems, I steam them for 3 1/2 minutes.)

2. Put them in a container and spread the I Can't Believe It's Not Butter into the asparagus. I usually spray mine with it until it is covered.

3. Season with Salt, Pepper, Garlic Salt, Mrs. Dash Seasonings.

4. Squeeze the half of a small lemon over it and serve.

The Verdict:
The asparagus will have tangy, salty, and yummy taste. I usually serve this whenever I make steaks, but it is good with schnitzel and everything else. I can eat this everyday if not for the nuclear pee that usually follows after eating this. LOL.


1.25.2012

Project: Chicken Pillows with Gravy

Want chicken pot pie without the wait? I have the solution!

CHICKEN PILLOWS!

I made some changes (as always), and it turned out to be pretty good.

To see the recipe, click here.

Instead of using canned chicken (Which I'm sure is fine if you decide to use it), I cut out chicken breast strips, seasoned it with salt, pepper, and garlic salt. I cooked it in medium heat, with a little oil. I browned the meat and let it cool for a bit before shredding it.

I followed the recipe after that. I realized that it is a bit time consuming with the folding of the dough, and breading it with italian bread crumbs after dipping the dough ball filled in melted butter.

After putting them in the oven to bake in their goodness, I made gravy. I would suggest that if you like gravy, you might want to double the recipe. You can actually make it when you're waiting for the chicken pillows to cool.

I baked mine for 25 minutes and let it cool. The pillows looked really good and had to wait for it to cool down before tasting it. I drowned mine in gravy and dug in.....

OH. MY.
CHICKEN POT PIE with a crunch!

It was heavenly and comforting. The kind of food that makes your body warm and your heart happy.

The verdict:
It was really good and yummy. The kind of meal you would want on a rainy day. Or any day. The only problem I had was that I had to form the balls. It was a bit time consuming, but that's probably because I was dragging it. LOL. But at the end, it was amazing! Plus, the crunchy exterior complimented the gravy and filling.

1.22.2012

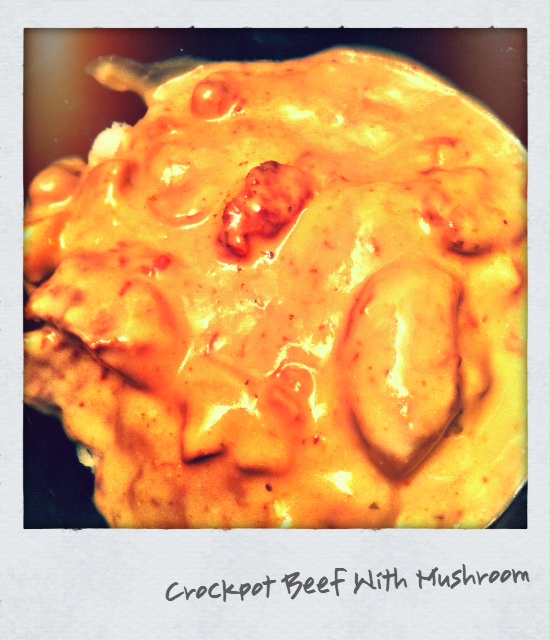
Project: Crockpot Beef with Mushroom


I made this the week before but forgot to blog about it or take pictures. Yes, it was consumed within the next few days that I wasn't able to take a picture of it. Plus, my bowl was significantly messy, just because that's how I roll. LOL.

Anyway, this recipe has been with me for a decade. I remember making this one during one of my horrible Home Economics class. No, I did not ace that class. I have never cooked that after that class. I am not the domesticated type, but living 600 miles from my parents made me teach myself how to cook. And there is a limit as to how many times I'll make myself scrambled eggs when I am hungry. Cooking during the weekend with the Pinterest recipes I find has helped me become a better cook, learning a lot of things while getting the experience. No, the cooking shows I've seen are so different from what I had to undergo. And NO, I did not look like I was calm and collected when I cook, think of a warzone. Yes, a chaotic warzone.

So, after years of not eating this dish, I decided to give it a try and remember what ingredients I need. I cooked it in a crockpot just because it'll be safer to do it, and not overcook the beef.

Here's the recipe:

Marinade: 
1 cup Teriyaki Marinade
1/4 cup Soy Sauce
1 Tablespoon Worcestershire Sauce
1/2 Tablespoon Salt
1 Teaspoon Pepper
1/4  Teaspoon Garlic Salt
1/4 Cup Agave Nectar

Ingredients:
1 1/2 - 2 Lbs Boneless Sirloin Top Round
3 Jars of Vigo Marinated Italian Style Mushrooms
3 Cans of Cream of Mushroom Soup
2 Cups Water
1/2 Cup of  Philadelphia Italian Herbs and Cheese Cooking Cream Cheese
2/3 Cup Grated Parmesan Cheese
*2 Tablespoons Flour-- Optional, use with a 1/4 cup warm water if the sauce is too watery for you.

Things you will need:
1 Gallon Ziploc Bag
Crockpot
pan
Cutting board


Procedure:
1. Put all the ingredients for the marinade and put in a Ziploc bag (1gallon).

2. Cut up the beef in cubes or strips and place inside the bag with the marinade. Let the beef sit in the delicious marinade for a few hours, or overnight (like I do).

3. In a pan, put in medium heat, and place the marinated beef and brown it. Wait for the beef to caramelize, then put in the crockpot.

4. Drain half of the liquid in one mushroom jar to the crockpot, and cut mushrooms in  half. Drain the rest of the liquid in other jars and cut the mushrooms (You dont need it the liquid from the other jars).

5. Open Soup cans and put contents in the crockpot.

6. Put the 2 Cups of water in the crockpot. Mix.

7. Turn on the crockpot to Low. After 3 hours, open it and put the Italian Herb and Cheese Cream Cheese and Parmesan Cheese in the crockpot. Mix.

8. If sauce is too watery for you, mix flour and warm water, then put in the crockpot. This is prevent the flour from clumping. (A lesson I learned when I first cooked this last week).

9. Turn it on high and let it simmer for an hour.

10. After an hour, turn crockpot off and let it cool before serving. Serve with rice, pasta, or mashed potatoes.

Cooking the beef before putting it in the crockpot cuts the time in half. Plus, we will make the beef very tender by cooking it slowly in the sauce.

The verdict:
Yummy, yummy, yummy! It tastes like Beef Burgundy. The mushrooms and its marinade gives the sauce a bit of a tangy taste, cutting through the saltiness. The beef is very tender, and also complements the sauce. Overall, a good dish to make when it's chilly because eating it warms up the whole body with its deliciousness.

Author's Comment:
If you do not like mushrooms that much, you can cut it to 2 jars. You might not want to skip the water in the sauce as it will be salty if you remove it. If it is too salty for you, add 1/2 Cup Milk and 1/2 cup water to the sauce and let it simmer.

1.21.2012

Project: Crockpot Pork and Roasted Garlic Mashed Potatoes


The Roasted Garlic Mashed Potatoes caught my eye and enticed me to make this meal. Since we're still in our Crockpot phase, we immediately got the ingredients (which were cheap!) and got to cooking.                            

I made this around 2 am, and by 10am, the pork was really tender. The roasted garlic can be made an hour before the pork finishes cooking, or before you make the mashed potatoes.

For the recipe, click here.

I followed the recipe and cooked it for more than the required 6 hours. I made the roasted garlic, and got the potatoes cooking. While the preparations took longer than I wanted, the mashed potatoes was a bit complicated for me (first time making it).

The Verdict?
We loved the mashed potatoes. The Roasted Garlic made it so good! The pork however, was just good. The mashed potatoes was the highlight for me. 

I'll probably make the mashed potatoes more often than I will make the pork.

1.16.2012

Project: Crockpot Cream Cheese Chicken Chili


This is another of our Crockpot Adventures. This recipe was enticing since its ingredients were easily available, plus, who doesn't love chili?

We stuck with the recipe, although we used Texas Pete instead of chili powder (because guess what, WE DID NOT HAVE CHILI POWDER!) Creativity is the key to cooking, and we're good at that. LOL.

To view the original recipe and ingredients, click here.

It is simple. Put all the ingredients together, leave and let it cook for 6-8 hours, stirring occasionally. We cooked it for 8 hours and by dinner time, it was good to go!

Careful though, it is hot! (Trust me on this one) Let it cool for a bit before devouring it!

The Verdict:

It was really good. The chicken was tender, and the chili was really good. The cream cheese made it creamy, but not heavy. The ingredients complemented each other and it makes a great dinner when it's chilly out. Plus, just put it in before leaving for work, and it should be ready when you get home!

1.15.2012

Project: Best Schnitzel Ever!


Looking for a recipe for Schnitzel, we came across an easy version of this dish. The ones we found on Pinterest were too complicated, and had too many ingredients. We found this recipe and it was easy and did not require a lot of ingredients (which meant no trip to the store for me!).

The recipe asks for:
Veal cutlets ( we got thin cuts so we didn't have to pound it)
1/2 cup bread crumbs
1/4 cup flour
1/4 tsp salt
2 eggs
Lemons
Salt and Pepper

SEE??? EASY!

Procedure:
1. Crack eggs and beat whiskly. Season the veal with salt and pepper.
2. In another plate/ container, put together the flour and salt.
3. Put bread crumbs in another container.
4. Dip veal in the flour mixture, covering it well. The dip in the egg mixture, letting the excess drip for a few seconds, and finally, place the veal in the breadcrumbs and cover it well.
5. Let the breaded veal sit for 5 mins on a plate
6. Pour oil in a pan in medium heat, and keep on medium heat. Keep in mind that the oil should cover at least 1/4 inch of the pan. This will help in keeping the schnitzel crunchy as it will not absorb a lot of oil, as compared to when you put it on high heat.
7. Place the veal in the pan, letting it cook thoroughly. Flip it when the cooking side is golden brown. Let the other side cook.
8. When the veal is done cooking, let it rest on paper towels on plate so it absorbs the excess oil.
9. Squeeze lemons on top and enjoy!

The Verdict:

ABSOLUTELY LOVE IT! Need I say more?

1.14.2012

Crockpot Cheesy Chicken Spaghetti


We saw this recipe and decided to give it a try because it looked really good, plus, we were looking for a crockpot recipe. We made some changes to it, like using angel hair pasta instead of spaghetti, and adding 1 cup of water instead of 1/2 that the recipe asked for. 


To view the pin, click this link.


To see the recipe, click here
So, the verdict?
We think some people will like it more than we did. It wasn't bad or gross, it simply did not work for us. It did not taste like we expected it to, and that the texture put us off.
The angel hair made it mushy, and almost like a casserole. Plus, there was too much cheese in the recipe. It was almost like a dip, and it tasted like a chicken enchilada without the casing. We are not sure how it would have tasted had we stuck to the recipe, but it was too creamy and heavy for our taste.
We thought the recipe was good, but it just didn't suit our taste. Some people love it, so feel free to give it a try! 

Happy Pinning!

1.08.2012

Project: Kickin' Honey Glazed Chicken


I was browsing through Pinterest and saw a recipe for a Spicy Honey Glazed Chicken. I looked at the recipe and liked it because....

1. it is easy peasy. (no, really, it is!)

2. it asked for simple ingredients that would be in anyone's kitchen

3. it didn't say that I would have to do any complicated stuff (no injecting, rolling, tying, cartwheeling, that kind of stuff)

So, I bought the chicken thighs (Boneless, skinless) and gathered the ingredients. I did some modifications with mine because I didn't have some of the ingredients, and mostly because the lightbulb in my head was working.

I swapped some things like seasoned pepper instead of fresh cracked pepper, skipped the chili powder (because I didn't have it and it would be weird to knock on my neighbor's door for a teaspoon of chili powder), put 1 1/2 teaspoon garlic powder, then put 1 teaspoon of freshly cracked garlic salt. I also put Texas Pete with the honey glaze, just because.

For you folks who want the original recipe, click here.

Here's what we need:

A.) 1 package of boneless, skinless chicken thighs

B.) Seasoning:
1 teaspoon Kosher salt
1 teaspoon seasoned pepper
1 teaspoon Red Pepper flakes
2 teaspoons Paprika
1 1/2 Garlic Powder
1 teaspoon Freshly cracked Garlic Salt

C.) Glaze:
2/3 cup Honey
1 tablespoon Texas Pete (or more, if you really want a KICK!)
2 tablespoons Apple Cider Vinegar

D.) A working Oven with Broil Option

E.) Food Brush (For Glaze) (Please do not use a paintbrush! I know some peeps will!)

Procedure:
1. Turn on Oven to Broil

2. Lay the chicken thighs flat on a baking tray (I used a 12x8 tray)

3. Mix all the seasoning ingredients.

4. Season the chicken thighs with the seasoning mix. Rub them on the chicken for a deeper flavor. Work those hands! Flip the chicken thighs and season the other side.

5. Put the tray with the seasoned chicken in the oven for 8 minutes. (You can put them in longer if you want a well-cooked chicken, but remember, you'd be putting the chicken back in the oven for the glaze to caramelize, so be careful not to overcook) (You can also cook it for a shorter time, depending on your liking, but be aware of the dangers of eating raw chicken...)

6. When the beeper sounds, or if you use your amazing sense of time and it said 8 minutes have passed, take the tray out, flip the chicken and put it back in the oven. Let the chicken cook for another 8 minutes.

7. Mix the glaze while waiting for the chicken to cook.

8. When the beeping sound is heard, or again, your amazing sense of time tells you it's time, take the chicken out. Grab the brush and the glaze, and baste (which is really brushing) the chicken with the glaze. Make sure to cover the chicken well.

8. Put the tray back in the oven and let the glaze work its magic. (Mine took about 5 mins)

9. When you see the glaze thickening, (or the glaze thickening on the tray) take it out and flip the chicken and baste the other side. Put it back in the oven.

10. When you see the glaze bubbling on the tray, and your chicken have that oh-so-yummy caramel color, it's time to take it out and let it cool for a bit. What I did was that I rubbed the chicken to the thick glaze on the tray. MMMMMMMM....

11. LET IT COOL. Believe me, you'll want it to cool before you eat it. I know why.

12. Grab a plate, put some chicken, and scoop some of that glaze. ENJOY!

I really liked my version of the recipe (simply because I have adapted it to suit my taste buds, and you can change it too!) because I used the ingredients I have at hand. If you somehow dont have a couple of the ingredients, don't fret. You can always substitute,or you can do the "ask your neighbor" thing (it pays to have good social skills). Just make sure you have the main ingredients. LOL.

Another thing, this recipe is both on the sweet and spicy (especially when you ate a chunk with the red pepper flakes). If you would like it to be spicier, I suggest you to put a bit more of the spicy stuff in OR put more Texas Pete on the glaze. I liked the outcome because it tasted like a mild version of General Tso's without the frying or the huge pepper pieces that you get to eat and realize too late that it wasn't garlic.

Enjoy!