Let's say, you're making a dessert, and right in the middle of it, you realize that you dont have enough heavy cream for the recipe, or worse, you forgot to grab it.
Now, what do you do? Abort the dessert? NO! That would be criminal! Find a way to make heavy cream? YES! And here's how to do it!
"Heavy Cream" Recipe: makes 1 cup
Ingredients:
1/3 cup Butter
3/4 cup Milk
Procedure:
1. Melt the butter and let it cool.
2. Heat the milk until warm. It is very important or the butter will become solid if you pour it into cold milk.
3. Pour the melted butter into the milk, and beat it for a few minutes until well combined.
There it is! Just use it as asked in the dish or dessert recipe.
2.26.2012
Project: Chocolate Ricotta Mousse

I've never made a mousse before, and this was a challenge for me. Not because it was hard to make, but because I've never done it so I don't know if I'm doing it right.
Lucky for me, this recipe is easy. To see the original recipe, click here for Skinnytaste's blog
Chocolate Ricotta Mousse:
Ingredients:
2 cups part-skim ricotta cheese, for creamier consistency
you can use regular ricotta.
3 1/2 tablespoons unsweetened cocoa powder
2 large egg whites
1/2 cup sugar
pinch of salt
Procedure:
1. In a saucepan, cook the egg whites, sugar and salt over medium heat. Whisk until sugar is melted and the mixture is frothy. Remove from heat.
2. In a bowl, beat the ricotta cheese and the cocoa powder until it is smooth. You must beat it until it is really smooth or else the mousse would be gritty.
3. Fold the egg white mixture into the cheese mixture until it is well combined.
4. Pour over ramekins and chill for at least 3 hours before serving.
The Verdict:
It is heavenly! It is airy, creamy and chocolatey! Perfect dessert if you're on a diet and just have that chocolate craving. I've done this twice already! If you want creamier consistency, use regular ricotta cheese!
Project: Creme Brûlée

Dessert. The word that would always be on my mind whenever I eat. I am the type of person that would eat dessert anytime. I can eat dessert but not the entreè. That is how much I love desserts.
Making creme brûleè has always been a dream of mine. And I finally made it! It was easier than I thought, which is the best part.
To see the recipe, click here.
The Verdict:
I loved making this easy dessert! it was creamy, and it was just perfect! Plus, the crunch of the melted sugar, and the creamy custard will definitely make you feel that you are the best chef there is. LOL.
Project: Best Broccoli

Most people don't like broccoli. I used to. Actually, I used to not eat vegetables. But this is going to change since one of my resolutions for Lent is to only have 1 meat dish everyday. Not easy for me, but making it. This recipe sounded good to me, plus what trouble can I get into?
Boy, did I get in trouble. I LOVED THIS RECIPE!! It is safe to say that I will be making this a lot during this Lenten season.
The recipe is simple, and the ingredients are easy to find!
Note: If you wash the broccoli, make sure that you dry it well, or else it will not get crispy.
Best Broccoli Recipe:
Ingredients:
1 bunch of broccoli ( pre-packaged bunch)
6 1/2 tablespoons of Olive Oil
1 teaspoon salt
1/4 teaspoon pepper
1/4 teaspoon garlic salt
2 cloves of garlic, sliced
1 lemon
1 cup grated Parmesan cheese (I use three blend parmesan)
Procedure:
1. Preheat oven to 425 degrees.
2. Cut the broccoli into florets. Place them in a baking sheet or pan lined with foil (for easier cleanup).
3. Pour 5 tablespoons Olive oil into the broccoli, sprinkle salt, pepper and garlic salt.
4. Toss in the garlic slices. Toss everything together, until florets are well seasoned and covered with oil.
5. Put in the oven for 15-20 minutes. The smaller the florets that you cut, the less time it will need to cook.
6. When it is crispy and browned (NOT BURNT!), take out the broccoli, and pour the rest of the olive out.
7. Transfer to a plate. Squeeze lemon over the broccoli, and sprinkle the parmesan cheese.
8. Toss and serve. Enoy!
The Verdict:
The broccoli was crunchy, and chewy in some parts. The lemon really brightened up the flavor of the olive oil and parmesan. It was really good, and in my opinion, if parents would serve this to kids, they wont have problems eating there veggies.
Project: Panera Mac & Cheese

WHO DOESN'T LOVE MAC & CHEESE??? I certainly love it! Growing up where Mac & Cheese was not a staple, I am addicted to it. I can eat it everyday! But this version is amazing! It is relatively easy to make, and it was interesting to find out what hot sauce and mustard can do to make this recipe great.
It did not fail me.
I was in love again. With this version of mac & cheese. LOOOOOOVE IT! Plus, knowing that anything from Panera tastes good, I was not worried trying this out!
Here it is: the magical recipe that I tried. I made some subtle changes, if you're wanting the original recipe, click here.
Panera Mac & Cheese:
Ingredients:
1 package medium pasta shells
1/3 Butter
2 1/2 cups 2% reduced fat milk
6 slices American cheese, chopped
1 cup shredded extra sharp white cheddar cheese
1 tablespoon, 1/2 tsp Dijon Mustard
1 teaspoon sea salt
1/2 tsp Texas Pete hot sauce
Procedure:
1. Prepare pasta according to directions.
2. Melt butter in a large sauce pan over low heat. Whisk flour in the pan. Cook for 1 minute while whisking consistently.
3. Gradually whisk in Milk. Increase heat to medium. Whisk until mixture becomes thick.
4. Remove pan from heat. Add cheeses, mustard, salt, and hot sauce in the pan. Mix until cheeses melt, and sauce becomes smooth.
5. Stir in pasta, and cook in medium heat for 3 minutes. Stir before serving.
The verdict:
IT IS AMAZING!! Will definitely cook it again! It was creamy, and it was cheesy. Definitely in my fave recipes list!
Project: Not so Skinny Apple Cobbler
 Apple pies. I love Apple pies, or anything close to it. It's good whether it is served warm or just came out of the fridge. My type of dessert, since I can basically eat it as soon as I want it. LOL. I like this recipe since it's low calorie. However, I added more sugar on top than the recipe suggests.
Another change I made was that I did not use whole wheat flour, I just stuck with regular flour.
To see the original recipe, click here. This recipe was from Skinny Taste's Food Blog. Check out her blog! She has great recipes, plus she also puts the nutritional value and Weight Watcher's Points.
The Verdict:
It was good!! Definitely hit the spot good! Plus, its a low calorie recipe (Compared to other recipes)!
Project: Tres Leche Panettone de Casa
 I have been hankering for something sweet, but was too lazy to go to the store and grab some desserts. So, with much effort (no, not really) I searched for a cake recipe. Cakes are always good, and you can personalize it as much as you want. With that in mind, I saw this Panettone recipe, plus, it was the easiest recipe I found. Then, an idea popped in my head, "why don't I create a Tres Leche Panettone?" And the adventure began.
Here is the easiest Panettone recipe I found, from Julia's Healthy Italian Cooking Blog. It really was easy! And did it come out good! If you wanted a sweeter panettone, simply add more sugar. Make the panettone, and while it is still warm, make the tres leches and pour onto the cake.
Tres Leches Recipe:
1 can of Evaporated Milk
1 can of Condensed Milk
1 Cup of Milk
1. Mix everything together.
2. Pour into the warm cake in batches. Make sure it is well spread and every inch of the cake has the tres leches mixture.
3. Chill until ready to serve.
The Verdict:
I LOVED IT. I'm glad the panettone was not sweet, because the tres leches sure made up for the lack of sweetness in the cake. I'll definitely make it again!
2.11.2012
Project: Maple Mustard Glazed Chicken
 I've been in a health kick lately, but I really haven't been successful. LOL. Looking at various recipes that feature low calories but tons of flavor, I was given the option to slave over the stove, or eat out. Basically, I didn't find my options that attractive, until I found this recipe. This recipe brags 200 calories each serving, plus it packs a lot of flavor.. I mean, what can go wrong with Maple and Mustard flavors?? So, off I went to grab the ingredients. It wasn't hard, the ingredients can easily be found in your local grocery if not in your pantry. The procedure was easy enough, brown chicken, put other ingredients together, bake. Easy, right?
I substituted the maple syrup with Amber Agave, cutting the measurement in half. But other than that, I followed the recipe.
The Verdict:
It was really good. Plus, the flavors complimented each other. I put it over my salad and it was really moist, and had tons of flavor. The chicken can be served over rice too. Another recipe to put in my favorite list!
Project: Chicken with Dijon Glaze
 I've been looking at chicken recipes, and for low calorie ones. I saw this recipe from Julia's Healthy Italian Blog. and saw that this is easy and quick. Plus, I can just prepare it beforehand, put in the freezer, and thaw and cook it whenever I want it.
For the recipe, click here.
I followed the recipe, but I used chicken breasts. It might look good when it's marinating, but it turns into a beauty when it's cooked. Smells good too!
The Verdict:
The chicken smelled so good! Plus, the vinegar-y taste was just perfect. It was moist, flavorful, and pure deliciousness. It tastes amazing, plus the fact that it was so easy to make makes this a favorite!
1.31.2012
Project: Vegetable Beef Soup

I loved it on a frosty night or on a warm and breezy day. No matter the reason or the season, it hits the spot and is a crowd-pleaser for both cook and consumer.
This recipe is:
1. EASY to make.
2. EASY on the wallet. (It has only a few ingredients that are available in every grocery store. Plus, you'll probably have leftovers for the following day. This soup is ALWAYS better the next day!)
3. EASY on the time sensitive chefs. (Takes less than 45 minutes from prep to completion.)
Lorraine Hayen-Hilton's Vegetable Beef Soup:
1 package hamburger.
1 small onion (diced)
1 bag frozen mixed veggies
2 cups frozen cut okra
3 Tablespoons ketchup
1 box of beef broth
1/2 cup red wine (any brand is fine)
1 dash of worcestershire sauce
1 can (large) of diced tomatoes
3 dashes on basil, oregano, parsley
In a large pot, brown the hamburger and onion together. Turn your temperature to medium heat and add the remaining ingredients. Stir occasionally. When the vegetables are tender and the taste is to your liking, YOU. ARE. DONE. :)
Home Solutions 2: Press Here for Hunger

Information from:
First for Women Magazine. (2006). Smart Solutions: 250 Simple Remedies and Quick Fixes for Everyday Life. New York: Fall River Press.
1.30.2012
Home Solutions 1: Multiple Uses of Lemons

Information from:
Zukowski, Shea. (2009). Salt, Lemons, Vinegar, and Baking Soda. New York: Metro Books.
1.29.2012
Project: Mulled Cider

This drink is amazing! It is so yummy and will make you feel good as you drink it. I love drinking it at night, especially when it is chilly. Try it!
To see the recipe, click here.
Ingredients:
1 gallon Apple Cider
4 Cinnamon Sticks
1/2 cup Brown Sugar
3 Teaspoons Whole Cloves
2 Teaspoon Whole Allspice
Dash of Nutmeg
1 Orange, sliced in half
Coffee Filter
String
Procedure:
1. In a coffee filter, combine the nutmeg, Whole cloves, and whole allspice. Tie with string.
2. In a large saucepan, put the gallon of Apple Cider and place the coffee filter, 4 cinnamon sticks and the orange in it.
3. In medium heat, wait for the mixture to boil. Let it simmer for a few minutes after boiling, then turn off the stove.
4. Let the cider cool and let the spices stay in, however, you can take out the orange.
The Verdict:
It was soooooooo gooooooood. Wish it will snow here Columbia, SC, then it will be a perfect day to drink this!
Project: Cream Puffs
 I scream, you scream, I scream Puffs!
Yes. I love these little yummy desserts. I found this recipe waaaaaaaay long ago, back when I still haven't had this blog. So, I decided to make them again, after a year of longing for these little treasures. I have to warn you, making these requires a lot, I mean a LOT of arm work. Work out before eating this dessert. You will need to have someone work with you in case your arm gives out. BUT, when they bake and fill your kitchen with its heavenly smell, it is all worth it. I will be giving three different filling recipes for the cream puffs, so you can have options of what cream fillings you can put in these little monsters. And, you will need a piping bag. You can grab these cheap ones at your local groceries, or use a Ziploc bags, but make sure not to squeeze it too hard.
Here is the recipe:
Recipe 1: Choux Pastry:
Ingredients:
1 Cup Water
6 Tablespoons Butter
1 Teaspoon Sugar
1 Cup Flour, Sifted
3 Large Eggs, slightly beaten
1 Egg Yolk
1 Tablespoon Water
Parchment paper to line the baking sheet
Procedure:
1. In a saucepan, combine water, butter, and sugar together. Put in medium heat, wait for it boil, then turn the stove off. Preheat oven to 400 degrees.
2. Put the sifted flour into the pan, mixing with a wooden spoon. This is when the arm work starts. You will need to mix it with a wooden spoon until a dough is formed.
3. In medium heat, put the saucepan back and continue to mix it until it it slightly shiny and almost forms into a ball. The dough must look like it's not sticking to the sides of the pan.
4. Turn off the stove and put the dough in a bowl. Mix the dough until it is slightly cooled (About 3 minutes) ** Make sure to do this or the eggs that will be in the next step will cook if the dough is not considerably cooled before.**
5. Mix 1/3 of the beaten eggs into the dough, and mixing it well until the dough becomes tight. Put the other 1/3 of the eggs and mix it until the dough becomes tight again. Repeat this for the last 1/3 of the egg mixture.
6. Put the dough in a piping bag and pipe it in a baking sheet line with parchment paper.
7. Place the baking sheet into the oven for 15 minutes. Then, lower the temperature to 350 degrees and bake for another 27 minutes.
8. Take out the puffs and let it cool.
Recipe 2: Cream Filling # 1: (The Hard version)
Ingredients:
5 Tablespoons Sugar
2 Tablespoons Flour
250 ml Milk
2 Egg Yolks
1 Tablespoon Butter
1 Teaspoon Vanilla Extract
100 ml Heavy Cream
Procedure:
1. In a saucepan, combine the egg yolks, 2 tablespoons sugar, flour, milk, butter, and vanilla. Cook in low heat, stirring frequently. Cook until the mixture becomes thick and when you can see the bottom of the saucepan when you stir the mixture. Chill.
2. After the mixture has been chilled, whip the heavy cream and the rest of the sugar in a bowl.
3. Fold in the cooked mixture into the whipped cream. Chill until ready to serve with the puffs.
REMINDER:
This recipe will require you to have an arm workout for about 20-25 minutes. The cooking will take that long as you are cooking it in low heat. If you are looking for a custard texture kind of cream filling, this will be your recipe.
Recipe 3: Cream Filling # 2: (The Easy version)
Ingredients:
2 Cups Cold Heavy Cream
2 Tablespoons Sifted Confectioners Sugar
Procedure:
1. Beat the heavy cream until loose peak
2. Sift the sugar into the cream. Beat for 30 seconds.
This recipe will result into a light, and fluffy cream filling.
Recipe 4: Cream Filling # 3: (The Edited Version)
Ingredients:
2 Cups Cold Heavy Cream
2 Tablespoons Sifted Confectioners Sugar
1/2 Cup Chocolate chips
Procedure:
1. Beat the heavy cream until loose peak
2. Sift the sugar into the cream, beat for 30 seconds
3. Melt chocolate chips
4. Blend melted chocolate chips into the cream.
Recipe 5: Ganache
Ingredients:
1/4 Cup Chocolate Chips
1 Tablespoon Heavy Cream
Procedure:
1. Combine the chocolate chips and the heavy cream.
2. Melt the mixture in microwave for 30 seconds. Mix well until the the ganache is creamy and shiny.
ENJOY! Happy Baking!
Project: Creamy Lemon Chicken with Asparagus

This weekend, I was looking for something to eat. I came across 2 chicken breasts leftover from the Chicken Pillows. Then, I remembered that I got Philadelphia Lemon and Herbs Cooking Cream Cheese when I bought the groceries.
Recipe Number 1:
So I thought of making Creamy Lemon Chicken. Here are the ingredients that you will need:
2 Chicken Breasts, cut into strips
1/2 Cup Flour
Seasoning (Salt, Pepper, and Garlic Salt)
Oil for sautèing
1/2 Cup Philadelphia Lemon and Herbs Cream Cheese
*Capers (optional)\
*milk/water (optional for cream cheese)
Procedure:
1. Season the strips of chicken with the seasoning.
2. Dust the strips with flour
3. In a pan with some oil, on medium heat, sautè the chicken strips until brown.
4. Put the Philadelphia Lemon and Herbs Cream Cheese in the pan and cook in low heat.
5. The cream will thicken, if you want a more watery mixture, you can put milk or water.
6. ** Put the capers in.**
7. Let it cool and serve with mashed potatoes/rice/pasta.
The Verdict:
This recipe was a bit too creamy for me. So it would be good to serve it over something. The chicken was yummy, but the creaminess of the cream cheese was a bit overpowering since I did not eat with pasta or rice. It was good with mashed potatoes, but this dish would be better off on top of pasta or rice.
Recipe Number 2:
I am a big fan of asparagus. I never used to eat vegetables but this made me see how much I was missing. I LOVE THIS RECIPE. My friend made this and I adapted her recipe but made some changes to it. My version might not be that healthy, but it sure tastes good!
YUMMY ASPARAGUS:
1 Bundle of Fresh Asparagus
1/4 Cup of I Can't Believe It's Not Butter Spray
Salt
Pepper
Garlic Salt
Mrs. Dash Original Seasoning
Mrs. Dash Table Blend Seasoning
Half of a small lemon
Procedure:
1. Cook the asparagus. (I usually steam them. If they have thick stems, I steam them for 5 minutes. If they have thin stems, I steam them for 3 1/2 minutes.)
2. Put them in a container and spread the I Can't Believe It's Not Butter into the asparagus. I usually spray mine with it until it is covered.
3. Season with Salt, Pepper, Garlic Salt, Mrs. Dash Seasonings.
4. Squeeze the half of a small lemon over it and serve.
The Verdict:
The asparagus will have tangy, salty, and yummy taste. I usually serve this whenever I make steaks, but it is good with schnitzel and everything else. I can eat this everyday if not for the nuclear pee that usually follows after eating this. LOL.
Project: Shredded Apple Pie

Having a hankering for anything sweet, I saw this recipe and decided to give it a try. Since I am an apple pie fan, I was excited to make this. This was fairly easy, plus, it was quick to do. It took me about 10 minutes to make this, which was surprising. The chunk of the time I spent making this was for shredding the apples. The other ingredients were easy to find, and most of them would be in your pantry.
For the recipe, please click here. This is one of the easiest apple pie recipes I have ever found. You can try it and see!
The Verdict:
It tasted good, however, the texture reminded me of coconut, which is not a fave of mine. The ingredients blended well, and I found it delicious. It was just the texture of the apples that put me off the pie. So, if you love coconuts, this might be a good recipe for you!
1.25.2012
Project: Portugese Egg Tart
 When we still lived in the Philippines, we would go to our compound in Bulacan every weekend. It was an hour and a half drive, so we would usually stop by some stores to eat or grab snacks. I would always look forward to Fridays because I would be able to buy my favorite Portugese Egg Tarts. I love them so much my mom would always get a dozen, which I would usually finish up on our way to the compound. LOL.
Since I haven't had them for a while, when I saw the pin of the recipe, my heart skipped a beat. YES. I could hear Allelujah playing in the background as I was reading the recipe. Yes! It sounded easy! I am ready for a challenge! By this time, I was singing to myself how excited I was about the egg tarts.
I ran to the store and grabbed a dozen eggs, a vanilla bean, cornstarch, milk, sugar, and puff pastry. Yes, that's all we need!
To check out the recipe, click here. Since I was planning on making 24 pieces, I doubled the recipe. However, I only used one puff pastry sheet. I could've used more of it but I wanted more of the filling. LOL.
Beware:
This will require a lot of arm work. A LOT. You will need to constantly stir the milk, sugar, vanilla bean, and cornstarch as it cooks. It will take a while to thicken. I put mine on medium heat so it wont burn, but boy did it take a while. Then, you will need to put some of the mixture to the egg yolks little by little. You dont want to get an omelet out of that!
You will then need to put the egg mixture back to the stove and stir it constantly until it thickens. This again will take a while, and it will be harder to mix it as it thickens.
Be sure to thaw the puff pastry sheet and cut it in squares big enough to fit the muffin tray. Put the cooked filling in and put it in the oven to bake.
The Verdict:
It was good, but not the one I had back home in the Philippines. But it was a bit sweet, and the filling was a bit mushy for my taste. I was looking for a firmer texture and more of the egg taste.
I would have to look for another recipe or tweak it until it suits my taste.
Project: Chicken Pillows with Gravy
 Want chicken pot pie without the wait? I have the solution!
CHICKEN PILLOWS!
I made some changes (as always), and it turned out to be pretty good.
To see the recipe, click here.
Instead of using canned chicken (Which I'm sure is fine if you decide to use it), I cut out chicken breast strips, seasoned it with salt, pepper, and garlic salt. I cooked it in medium heat, with a little oil. I browned the meat and let it cool for a bit before shredding it.
I followed the recipe after that. I realized that it is a bit time consuming with the folding of the dough, and breading it with italian bread crumbs after dipping the dough ball filled in melted butter.
After putting them in the oven to bake in their goodness, I made gravy. I would suggest that if you like gravy, you might want to double the recipe. You can actually make it when you're waiting for the chicken pillows to cool.
I baked mine for 25 minutes and let it cool. The pillows looked really good and had to wait for it to cool down before tasting it. I drowned mine in gravy and dug in.....
OH. MY.
CHICKEN POT PIE with a crunch!
It was heavenly and comforting. The kind of food that makes your body warm and your heart happy.
The verdict:
It was really good and yummy. The kind of meal you would want on a rainy day. Or any day. The only problem I had was that I had to form the balls. It was a bit time consuming, but that's probably because I was dragging it. LOL. But at the end, it was amazing! Plus, the crunchy exterior complimented the gravy and filling.
1.22.2012
Project: Crockpot Beef with Mushroom
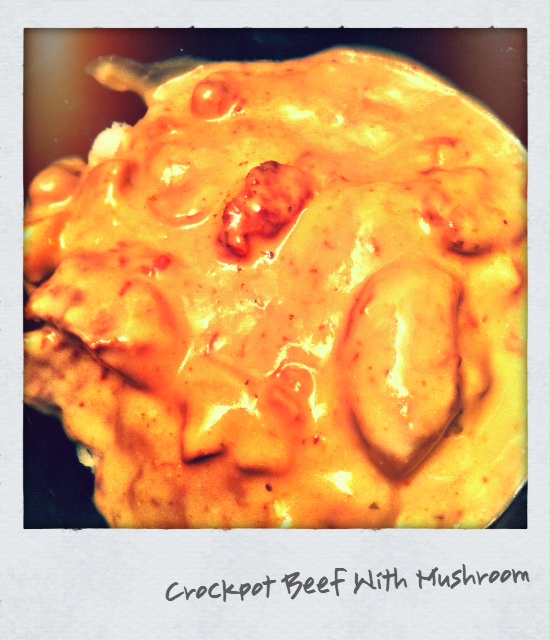
I made this the week before but forgot to blog about it or take pictures. Yes, it was consumed within the next few days that I wasn't able to take a picture of it. Plus, my bowl was significantly messy, just because that's how I roll. LOL.
Anyway, this recipe has been with me for a decade. I remember making this one during one of my horrible Home Economics class. No, I did not ace that class. I have never cooked that after that class. I am not the domesticated type, but living 600 miles from my parents made me teach myself how to cook. And there is a limit as to how many times I'll make myself scrambled eggs when I am hungry. Cooking during the weekend with the Pinterest recipes I find has helped me become a better cook, learning a lot of things while getting the experience. No, the cooking shows I've seen are so different from what I had to undergo. And NO, I did not look like I was calm and collected when I cook, think of a warzone. Yes, a chaotic warzone.
So, after years of not eating this dish, I decided to give it a try and remember what ingredients I need. I cooked it in a crockpot just because it'll be safer to do it, and not overcook the beef.
Here's the recipe:
Marinade:
1 cup Teriyaki Marinade
1/4 cup Soy Sauce
1 Tablespoon Worcestershire Sauce
1/2 Tablespoon Salt
1 Teaspoon Pepper
1/4 Teaspoon Garlic Salt
1/4 Cup Agave Nectar
Ingredients:
1 1/2 - 2 Lbs Boneless Sirloin Top Round
3 Jars of Vigo Marinated Italian Style Mushrooms
3 Cans of Cream of Mushroom Soup
2 Cups Water
1/2 Cup of Philadelphia Italian Herbs and Cheese Cooking Cream Cheese
2/3 Cup Grated Parmesan Cheese
*2 Tablespoons Flour-- Optional, use with a 1/4 cup warm water if the sauce is too watery for you.
Things you will need:
1 Gallon Ziploc Bag
Crockpot
pan
Cutting board
Procedure:
1. Put all the ingredients for the marinade and put in a Ziploc bag (1gallon).
2. Cut up the beef in cubes or strips and place inside the bag with the marinade. Let the beef sit in the delicious marinade for a few hours, or overnight (like I do).
3. In a pan, put in medium heat, and place the marinated beef and brown it. Wait for the beef to caramelize, then put in the crockpot.
4. Drain half of the liquid in one mushroom jar to the crockpot, and cut mushrooms in half. Drain the rest of the liquid in other jars and cut the mushrooms (You dont need it the liquid from the other jars).
5. Open Soup cans and put contents in the crockpot.
6. Put the 2 Cups of water in the crockpot. Mix.
7. Turn on the crockpot to Low. After 3 hours, open it and put the Italian Herb and Cheese Cream Cheese and Parmesan Cheese in the crockpot. Mix.
8. If sauce is too watery for you, mix flour and warm water, then put in the crockpot. This is prevent the flour from clumping. (A lesson I learned when I first cooked this last week).
9. Turn it on high and let it simmer for an hour.
10. After an hour, turn crockpot off and let it cool before serving. Serve with rice, pasta, or mashed potatoes.
Cooking the beef before putting it in the crockpot cuts the time in half. Plus, we will make the beef very tender by cooking it slowly in the sauce.
The verdict:
Yummy, yummy, yummy! It tastes like Beef Burgundy. The mushrooms and its marinade gives the sauce a bit of a tangy taste, cutting through the saltiness. The beef is very tender, and also complements the sauce. Overall, a good dish to make when it's chilly because eating it warms up the whole body with its deliciousness.
Author's Comment:
If you do not like mushrooms that much, you can cut it to 2 jars. You might not want to skip the water in the sauce as it will be salty if you remove it. If it is too salty for you, add 1/2 Cup Milk and 1/2 cup water to the sauce and let it simmer.
Project: Sopapilla Cheesecake

We saw this recipe before and thought it would be worth a try. Of course, wen I tried to make it, I didn't include it in my grocery list the ingredients for this recipe. Hence, I had to improvise.
Improvise meaning I had to make it a 1 can of crescent rolls instead of the 3 that the recipe asks for. What did I do? I used a round baking pan. Cut the crescent roll in half for the bottom and the other half for the top.
I put a foil in the pan and flattened it around it and put the dough, pressing it around the edges to mold around the pan. Then I lifted the foil and sprayed the pan with cooking grease. I mixed the filling, sticking with the recipe. Then I removed the dough from the foil and placed it on top of the filling.
I put melted butter and cinnamon sugar on top and put it in for 25 minutes at 350 degrees.
The verdict:
I loved how creamy the filling is, plus the crust is really good. This is an easy dessert that will cure your cravings. Will definitely do it again!
1.21.2012
Project: Crockpot Pork and Roasted Garlic Mashed Potatoes
 The Roasted Garlic Mashed Potatoes caught my eye and enticed me to make this meal. Since we're still in our Crockpot phase, we immediately got the ingredients (which were cheap!) and got to cooking.
 I made this around 2 am, and by 10am, the pork was really tender. The roasted garlic can be made an hour before the pork finishes cooking, or before you make the mashed potatoes.
For the recipe, click here.
I followed the recipe and cooked it for more than the required 6 hours. I made the roasted garlic, and got the potatoes cooking. While the preparations took longer than I wanted, the mashed potatoes was a bit complicated for me (first time making it).
The Verdict?
We loved the mashed potatoes. The Roasted Garlic made it so good! The pork however, was just good. The mashed potatoes was the highlight for me.
I'll probably make the mashed potatoes more often than I will make the pork.
Project: Chocolate Lava Cake

Here it is! The most favored Chocolate Lava Cake! Seriously, what could be wrong with that?? It's CHOCOLATE!
We've embarked on this project with such enthusiasm that we couldn't wait to eat it after the long precious wait of 2 1/2 hours.
Click here for the recipe.
We followed the recipe to a T, and I'm thinking that maybe I shouldn't have. It sure was the easiest cake I have ever made, and the best thing is, I just had to dump the ingredients and let them bathe in chocolate goodness.
The verdict?
When you crack the chocolate cake, the lava really does come out flowing. It was so pretty I almost cried. It was magical. I scooped it out the gorgeous dark cake with liquid chocolate flowing like a river. I couldn't wait to take a bite and just die.I almost did. From glycemic shock from all the sugar. It was too sweet for us. The Gooey lava was good but too sweet and almost made me sick after a few bites. Believe me, chocolate overload rarely made me sick, ask my friends, I steal from them.
After a few bites, I was done, never to touch that goodness again. I'm wondering if putting sour cream in it would've killed the sweetness and made it all better. I'll let you take on that project because right now, I can't make it yet.
The recipe was easy, it was good, but was too sweet for us. I hope you guys you have more luck than we did. And if you make it with sour cream, let me know how it comes out!
Till the next project!
1.16.2012
Project: Crockpot Cream Cheese Chicken Chili

This is another of our Crockpot Adventures. This recipe was enticing since its ingredients were easily available, plus, who doesn't love chili?
We stuck with the recipe, although we used Texas Pete instead of chili powder (because guess what, WE DID NOT HAVE CHILI POWDER!) Creativity is the key to cooking, and we're good at that. LOL.
To view the original recipe and ingredients, click here.
It is simple. Put all the ingredients together, leave and let it cook for 6-8 hours, stirring occasionally. We cooked it for 8 hours and by dinner time, it was good to go!
Careful though, it is hot! (Trust me on this one) Let it cool for a bit before devouring it!
The Verdict:
It was really good. The chicken was tender, and the chili was really good. The cream cheese made it creamy, but not heavy. The ingredients complemented each other and it makes a great dinner when it's chilly out. Plus, just put it in before leaving for work, and it should be ready when you get home!
1.15.2012
Project: Best Schnitzel Ever!
 Looking for a recipe for Schnitzel, we came across an easy version of this dish. The ones we found on Pinterest were too complicated, and had too many ingredients. We found this recipe and it was easy and did not require a lot of ingredients (which meant no trip to the store for me!).
The recipe asks for:
Veal cutlets ( we got thin cuts so we didn't have to pound it)
1/2 cup bread crumbs
1/4 cup flour
1/4 tsp salt
2 eggs
Lemons
Salt and Pepper
SEE??? EASY!
Procedure:
1. Crack eggs and beat whiskly. Season the veal with salt and pepper.
2. In another plate/ container, put together the flour and salt.
3. Put bread crumbs in another container.
4. Dip veal in the flour mixture, covering it well. The dip in the egg mixture, letting the excess drip for a few seconds, and finally, place the veal in the breadcrumbs and cover it well.
5. Let the breaded veal sit for 5 mins on a plate
6. Pour oil in a pan in medium heat, and keep on medium heat. Keep in mind that the oil should cover at least 1/4 inch of the pan. This will help in keeping the schnitzel crunchy as it will not absorb a lot of oil, as compared to when you put it on high heat.
7. Place the veal in the pan, letting it cook thoroughly. Flip it when the cooking side is golden brown. Let the other side cook.
8. When the veal is done cooking, let it rest on paper towels on plate so it absorbs the excess oil.
9. Squeeze lemons on top and enjoy!
The Verdict:
ABSOLUTELY LOVE IT! Need I say more?
1.14.2012
Crockpot Cheesy Chicken Spaghetti
 We saw this recipe and decided to give it a try because it looked really good, plus, we were looking for a crockpot recipe. We made some changes to it, like using angel hair pasta instead of spaghetti, and adding 1 cup of water instead of 1/2 that the recipe asked for.
 To view the pin, click this link.
To see the recipe, click here.
So, the verdict?
We think some people will like it more than we did. It wasn't bad or gross, it simply did not work for us. It did not taste like we expected it to, and that the texture put us off.
The angel hair made it mushy, and almost like a casserole. Plus, there was too much cheese in the recipe. It was almost like a dip, and it tasted like a chicken enchilada without the casing. We are not sure how it would have tasted had we stuck to the recipe, but it was too creamy and heavy for our taste.
We thought the recipe was good, but it just didn't suit our taste. Some people love it, so feel free to give it a try!
1.08.2012
Project: Ham And Egg Crescent Bake

The original recipe only asked for three ingredients, so I added milk and salt to it. My thought was that milk would make the eggs fluffier, and the salt was just for taste.
Click here for the recipe.
My Version was:
- 1 8oz Pillsbury Crescent Rolls
- 4 Large Eggs
- 1/2 cup Milk
- dash of Salt
- 1 cup diced ham
- 1 cup of mozzarella cheese or any cheese you prefer
1. Turn on oven and set it to 375 F
2. Roll out the Crescent Dough into a 12x8 greased pan. Press the dough to the pan, making sure to tuck the seams together.
3. In a bowl, scramble the eggs, salt and milk together. Pour into the pan with dough.
4. Top with diced ham and cheese and put in oven
5. Bake for 15-20 minutes.
6. Let it cool a bit and enjoy!
Review:
I really liked how fluffy the filling was, and it was sweet and salty. Perfect for those days when you just want breakfast to get over with. A really simple and fast recipe for a busy mom!
Project: Jello Pudding Pops
 |
| The pinned photo looks yummy! |
I decided to give this pin a whirl.
One thing i noticed while preparing is that the recipe says one thing while the caption under the pinned photo says another.
The CAPTION reads: (click here to view the pin)
"Remember pudding pops? 1 pkg instant pudding, 1 1/2c milk, 2c cool whip. Dissolve pudding in milk, whip in cool whip. Spoon into 3 oz dixie cups and insert popsicle stick. Freeze."
The RECIPE reads: (click here to view the original recipe)
1 package JELL-O Chocolate Sugar-Free Pudding
2 cups Fat-Free Milk
1 cup Sugar-Free Cool Whip
1. Beat pudding mix & milk in a medium bowl with whisk for about 2 mins.
2. Stir in Sugar-Free Cool Whip.
3. Spoon mix into small paper/plastic cups.
4. Insert wooden sticks into the middle of each.
5. Freeze for 4 hours or until firm.
- To remove from cups, run under warm water.
My Recommendation:
- Add 1/2 cup more milk than the pudding recipe states.
- Use plastic lollipop sticks. Easier the maneuver than wooden sticks (in the event your mixture isn't firm).
- Fold in 2 cups of cool whip.
- You may use the plastic/paper cups, but you can also use Popsicle molds (easily found in the grocery store).
*I'd LOVE to show you a photo of my finished product but it doesn't look as good as the pinned photo.
Project: Kickin' Honey Glazed Chicken

1. it is easy peasy. (no, really, it is!)
2. it asked for simple ingredients that would be in anyone's kitchen
3. it didn't say that I would have to do any complicated stuff (no injecting, rolling, tying, cartwheeling, that kind of stuff)
So, I bought the chicken thighs (Boneless, skinless) and gathered the ingredients. I did some modifications with mine because I didn't have some of the ingredients, and mostly because the lightbulb in my head was working.
I swapped some things like seasoned pepper instead of fresh cracked pepper, skipped the chili powder (because I didn't have it and it would be weird to knock on my neighbor's door for a teaspoon of chili powder), put 1 1/2 teaspoon garlic powder, then put 1 teaspoon of freshly cracked garlic salt. I also put Texas Pete with the honey glaze, just because.
For you folks who want the original recipe, click here.
Here's what we need:
A.) 1 package of boneless, skinless chicken thighs
B.) Seasoning:
1 teaspoon Kosher salt
1 teaspoon seasoned pepper
1 teaspoon Red Pepper flakes
2 teaspoons Paprika
1 1/2 Garlic Powder
1 teaspoon Freshly cracked Garlic Salt
C.) Glaze:
2/3 cup Honey
1 tablespoon Texas Pete (or more, if you really want a KICK!)
2 tablespoons Apple Cider Vinegar
D.) A working Oven with Broil Option
E.) Food Brush (For Glaze) (Please do not use a paintbrush! I know some peeps will!)
Procedure:
1. Turn on Oven to Broil
2. Lay the chicken thighs flat on a baking tray (I used a 12x8 tray)
3. Mix all the seasoning ingredients.
4. Season the chicken thighs with the seasoning mix. Rub them on the chicken for a deeper flavor. Work those hands! Flip the chicken thighs and season the other side.
5. Put the tray with the seasoned chicken in the oven for 8 minutes. (You can put them in longer if you want a well-cooked chicken, but remember, you'd be putting the chicken back in the oven for the glaze to caramelize, so be careful not to overcook) (You can also cook it for a shorter time, depending on your liking, but be aware of the dangers of eating raw chicken...)
6. When the beeper sounds, or if you use your amazing sense of time and it said 8 minutes have passed, take the tray out, flip the chicken and put it back in the oven. Let the chicken cook for another 8 minutes.
7. Mix the glaze while waiting for the chicken to cook.
8. When the beeping sound is heard, or again, your amazing sense of time tells you it's time, take the chicken out. Grab the brush and the glaze, and baste (which is really brushing) the chicken with the glaze. Make sure to cover the chicken well.
8. Put the tray back in the oven and let the glaze work its magic. (Mine took about 5 mins)
9. When you see the glaze thickening, (or the glaze thickening on the tray) take it out and flip the chicken and baste the other side. Put it back in the oven.
10. When you see the glaze bubbling on the tray, and your chicken have that oh-so-yummy caramel color, it's time to take it out and let it cool for a bit. What I did was that I rubbed the chicken to the thick glaze on the tray. MMMMMMMM....
11. LET IT COOL. Believe me, you'll want it to cool before you eat it. I know why.
12. Grab a plate, put some chicken, and scoop some of that glaze. ENJOY!
I really liked my version of the recipe (simply because I have adapted it to suit my taste buds, and you can change it too!) because I used the ingredients I have at hand. If you somehow dont have a couple of the ingredients, don't fret. You can always substitute,or you can do the "ask your neighbor" thing (it pays to have good social skills). Just make sure you have the main ingredients. LOL.
Another thing, this recipe is both on the sweet and spicy (especially when you ate a chunk with the red pepper flakes). If you would like it to be spicier, I suggest you to put a bit more of the spicy stuff in OR put more Texas Pete on the glaze. I liked the outcome because it tasted like a mild version of General Tso's without the frying or the huge pepper pieces that you get to eat and realize too late that it wasn't garlic.
Enjoy!
Subscribe to:
Posts (Atom)